


How to melt and reshape Mexican Hot Chocolate disks
Mexican hot chocolate is a delicious traditional drink but I have always had a problem with the shape, size, and how quickly it looks “old”. This information on reshaping and remelting solves this problem. By melting and reshaping the disks you already have, you can create cute, fun, and amazing shapes that also serve as single serving sizes and make great gifts.
Mexican hot chocolate disks are rock hard pieces of chocolate used to make chocolate drinks in Mexico and most of Latin America. The disks are made of cacao, sugar, and/or spices, and can be found in every Latin grocery store or in every Mexican, Colombian, and Guatemalan home in the world. The popular brands are Abuelita, Ibarra, Mayordomo, La Soledad, Luker, and Sol.
For an overview of what is and how to make Mexican hot chocolate from scratch, from cocoa beans, please visit my post here. This post you are reading now is purely dedicated to melting the disks that you might already have in your kitchen cabinet.
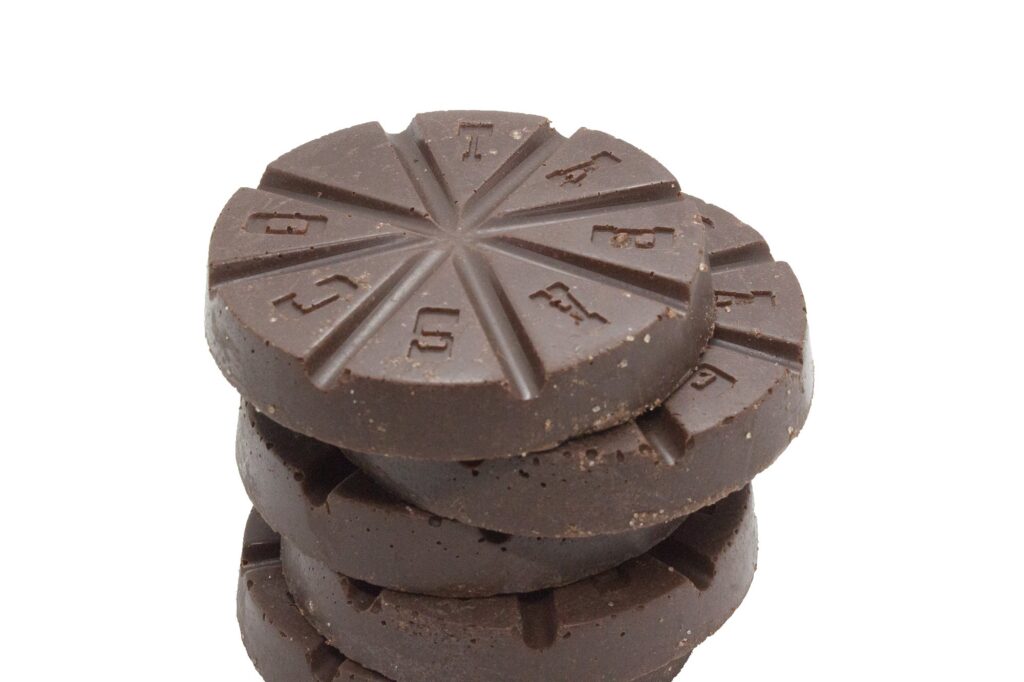
Below is an image of the brand Tikal Chocolate that is only available in Mexico and this is the shape that is most recognized as this style of drinking chocolate.
Mexican hot chocolate is how I know this style of chocolate and its how most Americans and internationals know it. But in Belize and Guatemala and all the way down to Colombia, they don’t call it Mexican hot chocolate. Instead, they just call it chocolate.
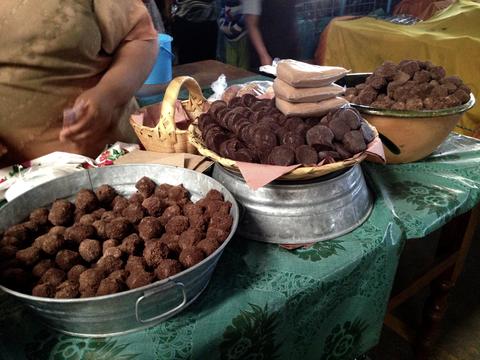
Mexicans in Mexico do not call it Mexican hot chocolate either. They call it chocolate de mesa or just chocolate. These also may come in the shape of rolled balls or squares, but the disks are the most popular shape. Below is an image of a woman selling Mexican hot chocolate in a mercado in Oaxaca. She makes different shapes to keep the flavors separate – she is selling chocolate with coffee, almonds and cinnamon.
My biggest problem with how this product is sold is the shape and size. They are usually too big for one serving and impossible to break apart. I understand why the big companies don’t make single size servings; it is a tradition to drink chocolate as a group, it is also more work to make a package of smaller pieces, and smaller pieces are prone to melting faster while it may be in transit or sitting in a store that may not be air conditioned.
You are not supposed to drink chocolate alone, so why make a single serving size? Since the time of the Aztecs, chocolate was meant to be drunk at festivals, rituals, weddings, and funerals. It’s a communal thing. In Nahuatl, the ancient Aztec language, there is a word that means to drink chocolate together: xocola’j. There is no word for ‘I am drinking chocolate alone.’
But sometimes you want a single serving or you want to impress your guests and this is the way to do it. I know the big companies started to make Mexican hot chocolate mixes, powders, and syrups to make life easier. But those have a lot of added things that you do not need. Stick to the disks, blocks, or balls – these recipes will be the most authentic and highest quality.
At first, I was on a mission to simply make single servings. But then I discovered a whole new world of amazing shapes and this made drinking chocolate more pleasurable.
Step one is to find these disks or blocks somewhere in your kitchen. If you are Mexican or Colombian I am 100% positive you already have some old chocolate in your kitchen. Kekua from Mexico and Casa Luker from Colombia, are high quality brands you can purchase. But the most common and cheapest brands are: Abuelita and Ibarra. Regardless of the brand you choose, it must already be in a solid form; you cannot begin this project with powdered chocolate or liquid chocolate. And it does not matter how “old” your chocolate is, it can work for this recipe.
Chocolate does not get old in the sense that it has expired – it just turns ugly, grayish, powdery, dry, or grainy. The cocoa butter and cocoa powder can shift into many crystals over time and make your chocolate look different but it will not affect flavor.
If sealed tightly, it will stay edible forever. But it does absorb odors easily so keep away from strong smells. This image below is of chocolate I bought in Guatemala 5 years ago. When I bought it, it was dark and shiny. Since I did not keep it in a cool, dark place, it bloomed – the cocoa butter came to the surface. After I melt it and mold it, correctly, it will turn into a shiny chocolate.
If you remelt these and they are still old looking … it’s not a big deal. Flavor is not affected at all. Since these will be melted into milk or water, then blended, the tempering of the disks is not necessary. Tempering is the process that you have to do if you want the chocolate to be shiny and if you want the chocolate to release well from the mold.
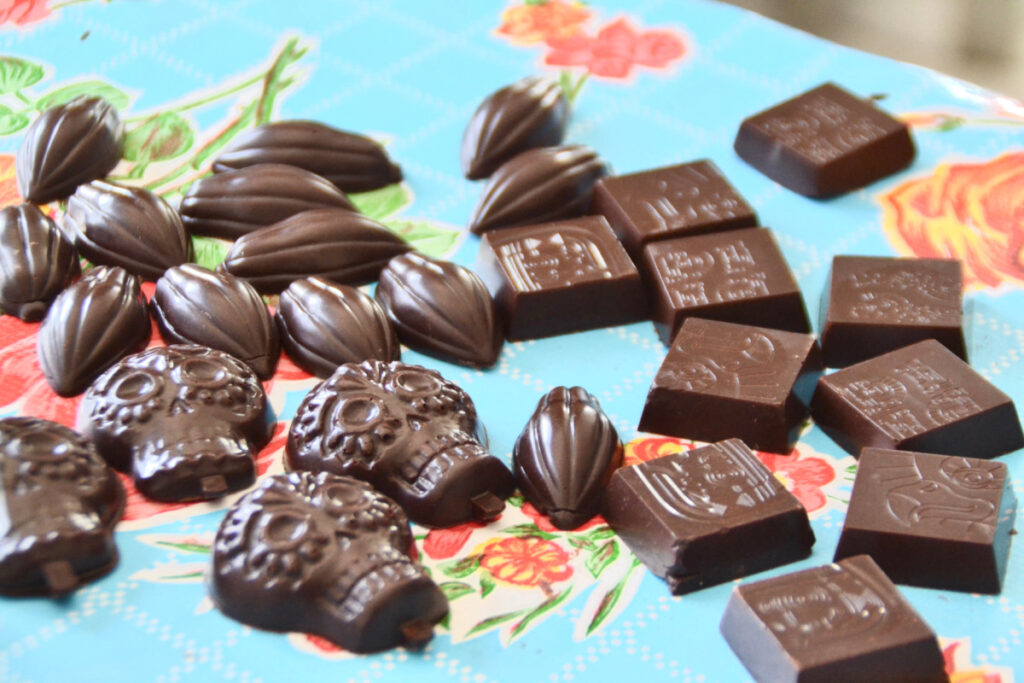
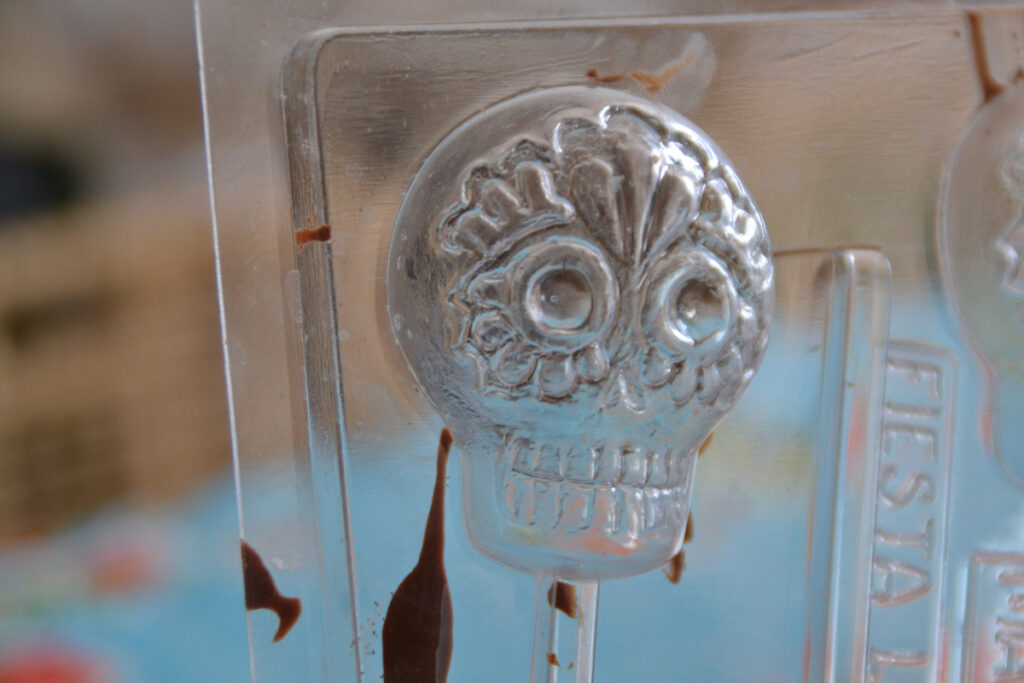
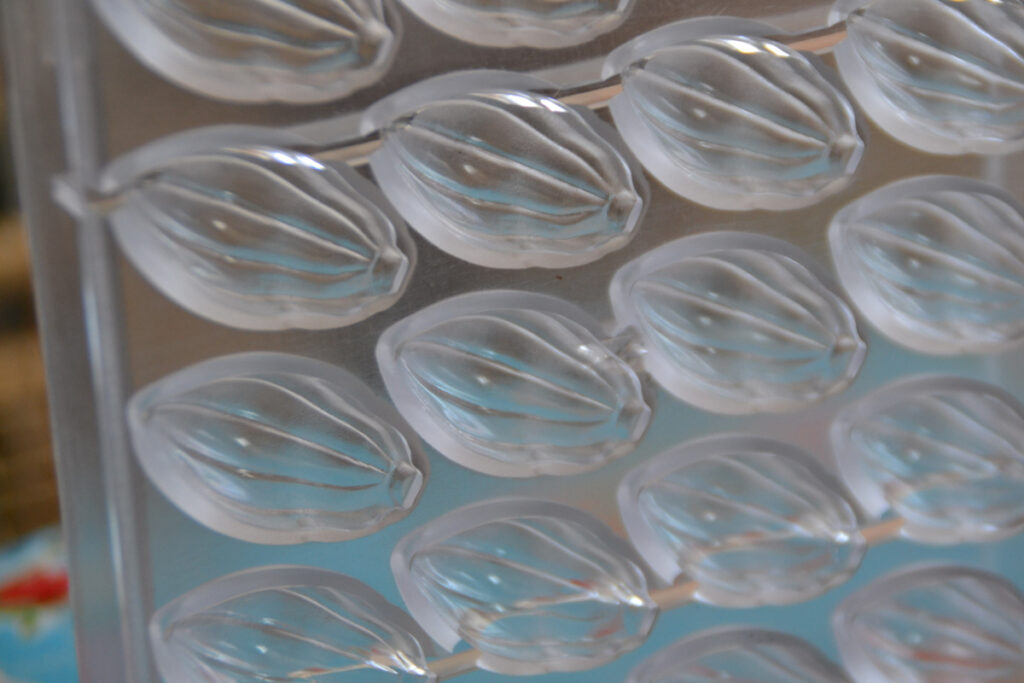
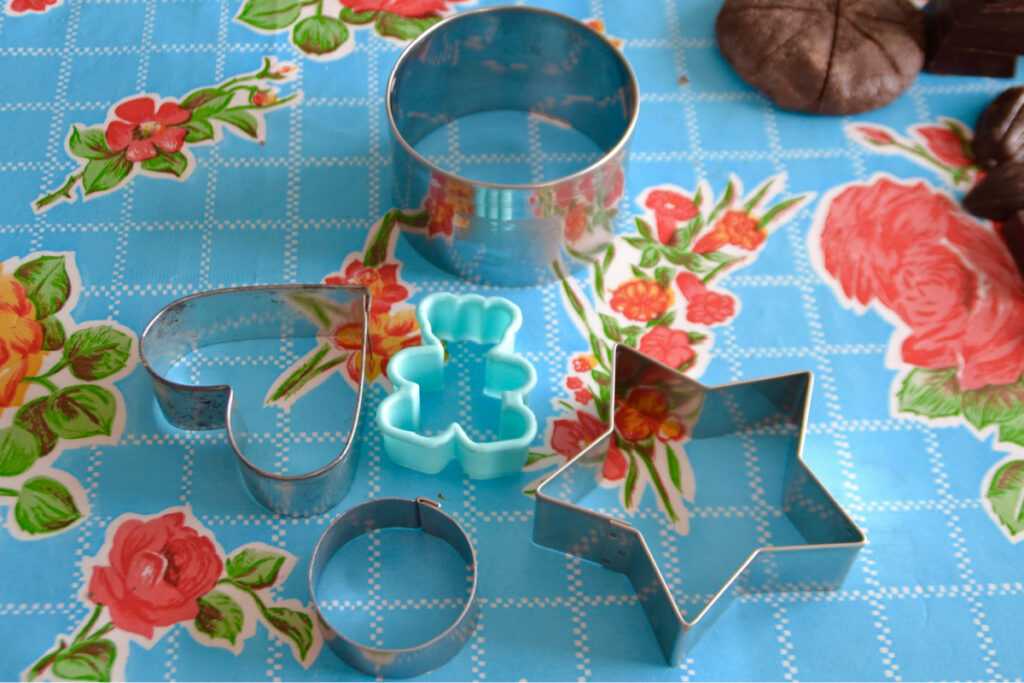
To mold your chocolate you can use plastic, polycarbonate, metal, silicone or wooden molds. You can use cookies cutters or the best tool, your hands. The cheapest option is plastic – these might break after 1 use but you can find the most variety of shapes in this material. Polycarbonate is expensive but will last you a lifetime. Silicone is best to use if you are working with kids.
Mexican hot chocolate disks will always be grainy, it is mostly the sugar crystals. It will all melt when you make the drink and blend with your milk or water.
A basic technique for tempering so you get shiny chocolate: melt 75% of your chocolate over steam, remove from steam, add the remainder 25% of your chocolate, stir until melted. Follow this order for molding: first mold in plastic molds, then cookie cutters, and finally with your hands. For molds you need it fairly fluid and for hand molding you need it cooler and harder. Place everything in the fridge for 15 minutes to harden.
Reshape Mexican Hot Chocolate disks
- Prep Time: 20 minutes
- Cook Time: 15 minutes
- Total Time: 35 minutes
Description
How to remelt Mexican Hot Chocolate disks to make them look new or to reshape in different designs.
Ingredients
Choose any of the brands below, the cheaper the brand, the sweeter it will be.
- Easiest brands to find: abuelita chocolate disks, ibarra chocolate disks, sol chocolate
- Better quality brands: la soledad chocolate, Mayordomo chocolate
- Best option because you can adjust sugar: Luker chocolate 100%
Optional- Any flavors you might want to add: ground coffee, instant coffee, ground cinnamon, ground spices, ground almonds/nuts, orange zest, etc. It has to be dry, nothing liquid. Liquids might make it difficult to re-mold. There is no specific quantity, add as much as you want, taste as you add.
Instructions
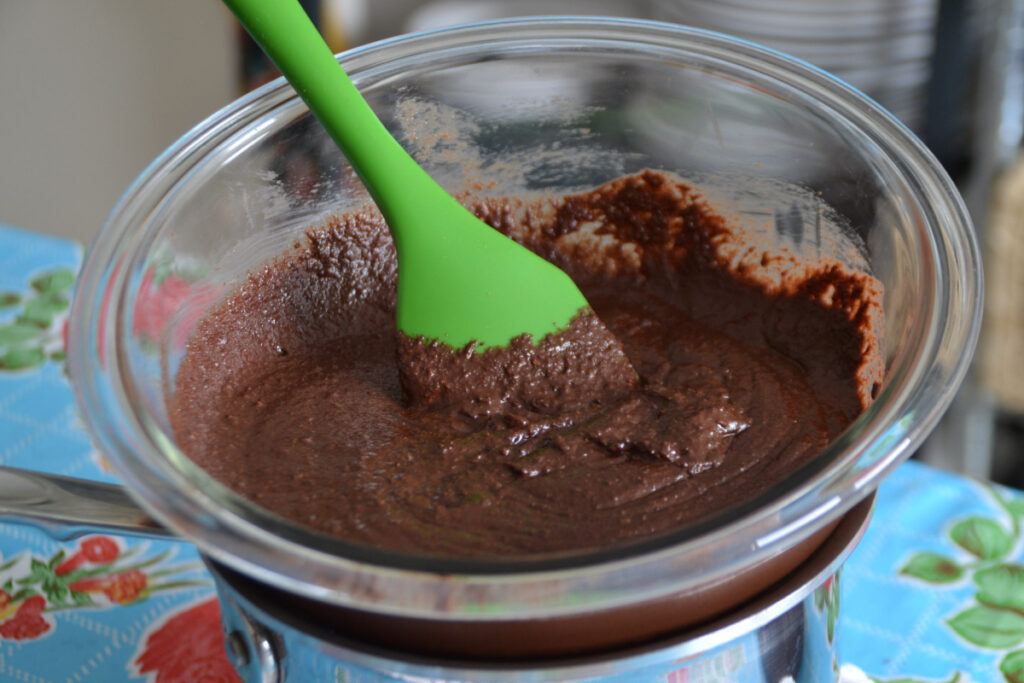
- Chop 75% of your disks or chocolate into smaller pieces if possible. You can melt in whatever shape you have them but it will take longer. Place the chocolate in a glass or metal bowl and place over a water bath or in a microwave. Chocolate burns quickly, so be very slow and careful during this process. Burnt chocolate cannot be salvaged.
- Add your flavors if you are using them.
- If you have a thermometer heat to 115f (45c). If you don’t have a thermometer, heat until it feels uncomfortable when you put some on your wrist. But it shouldn’t burn you. Only be very hot.
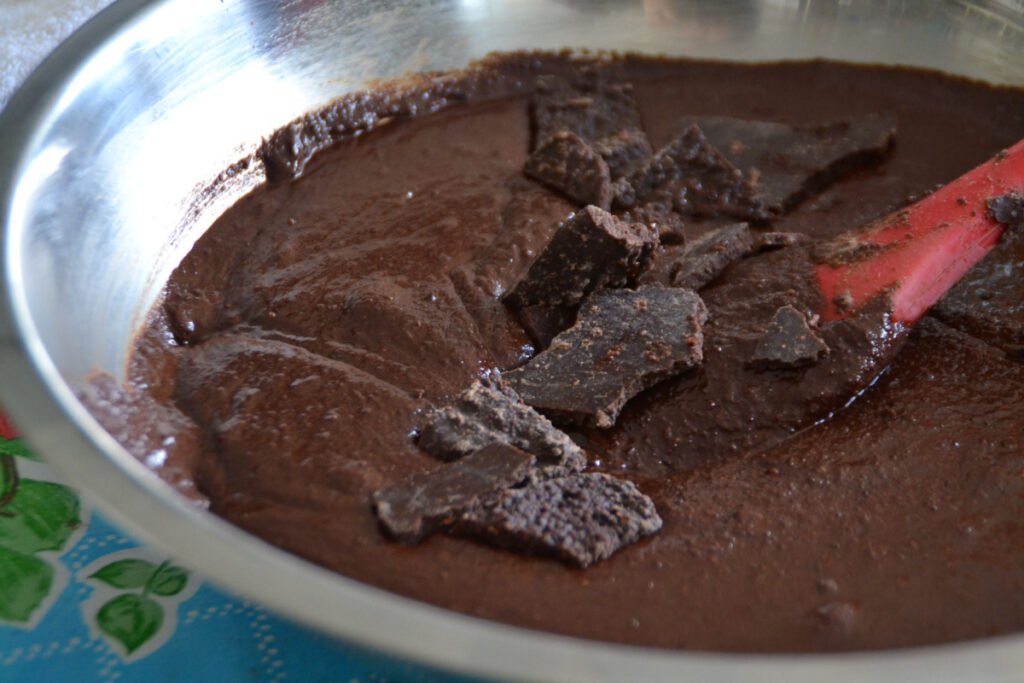
- Once it has melted, remove from the heat; add the remainder 25% of your chocolate to help cool it down. The idea is to melt 75% of your chocolate and have an extra 25% or so to cool it down. This process is very important if you are going to put your chocolate into plastic molds, this process will help release them.
- Stir the mix until all the chocolate has melted. The mix will begin to get thick but still be easy to move. If your mix begins to harden and the additional disks are not melting, you did not heat enough in the beginning. Heat the bowl a small amount, about 30 seconds. And stir again.
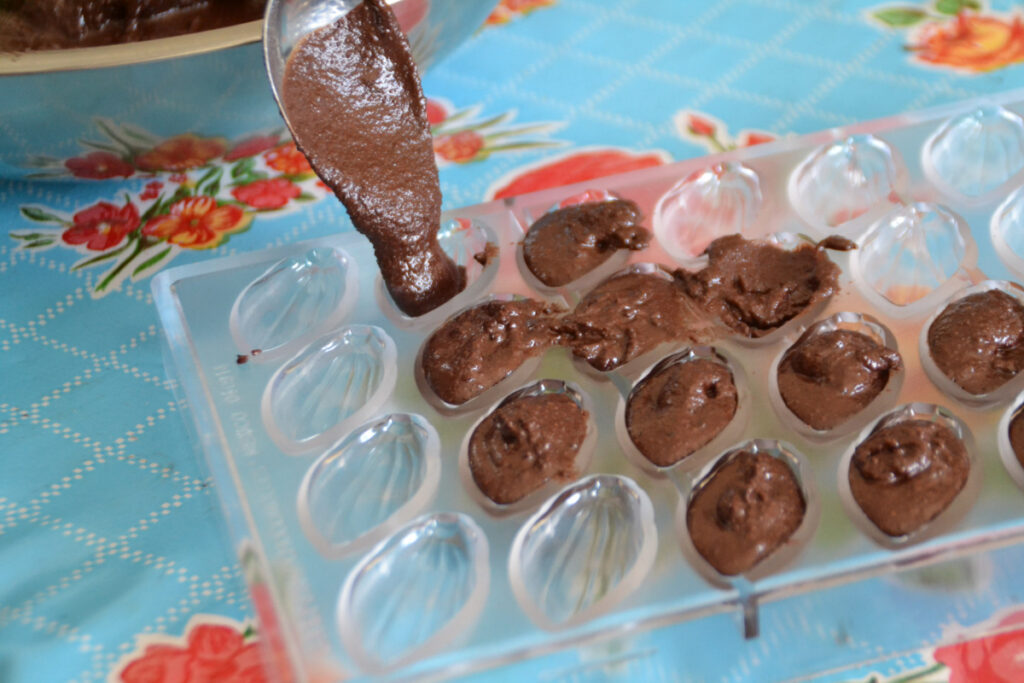
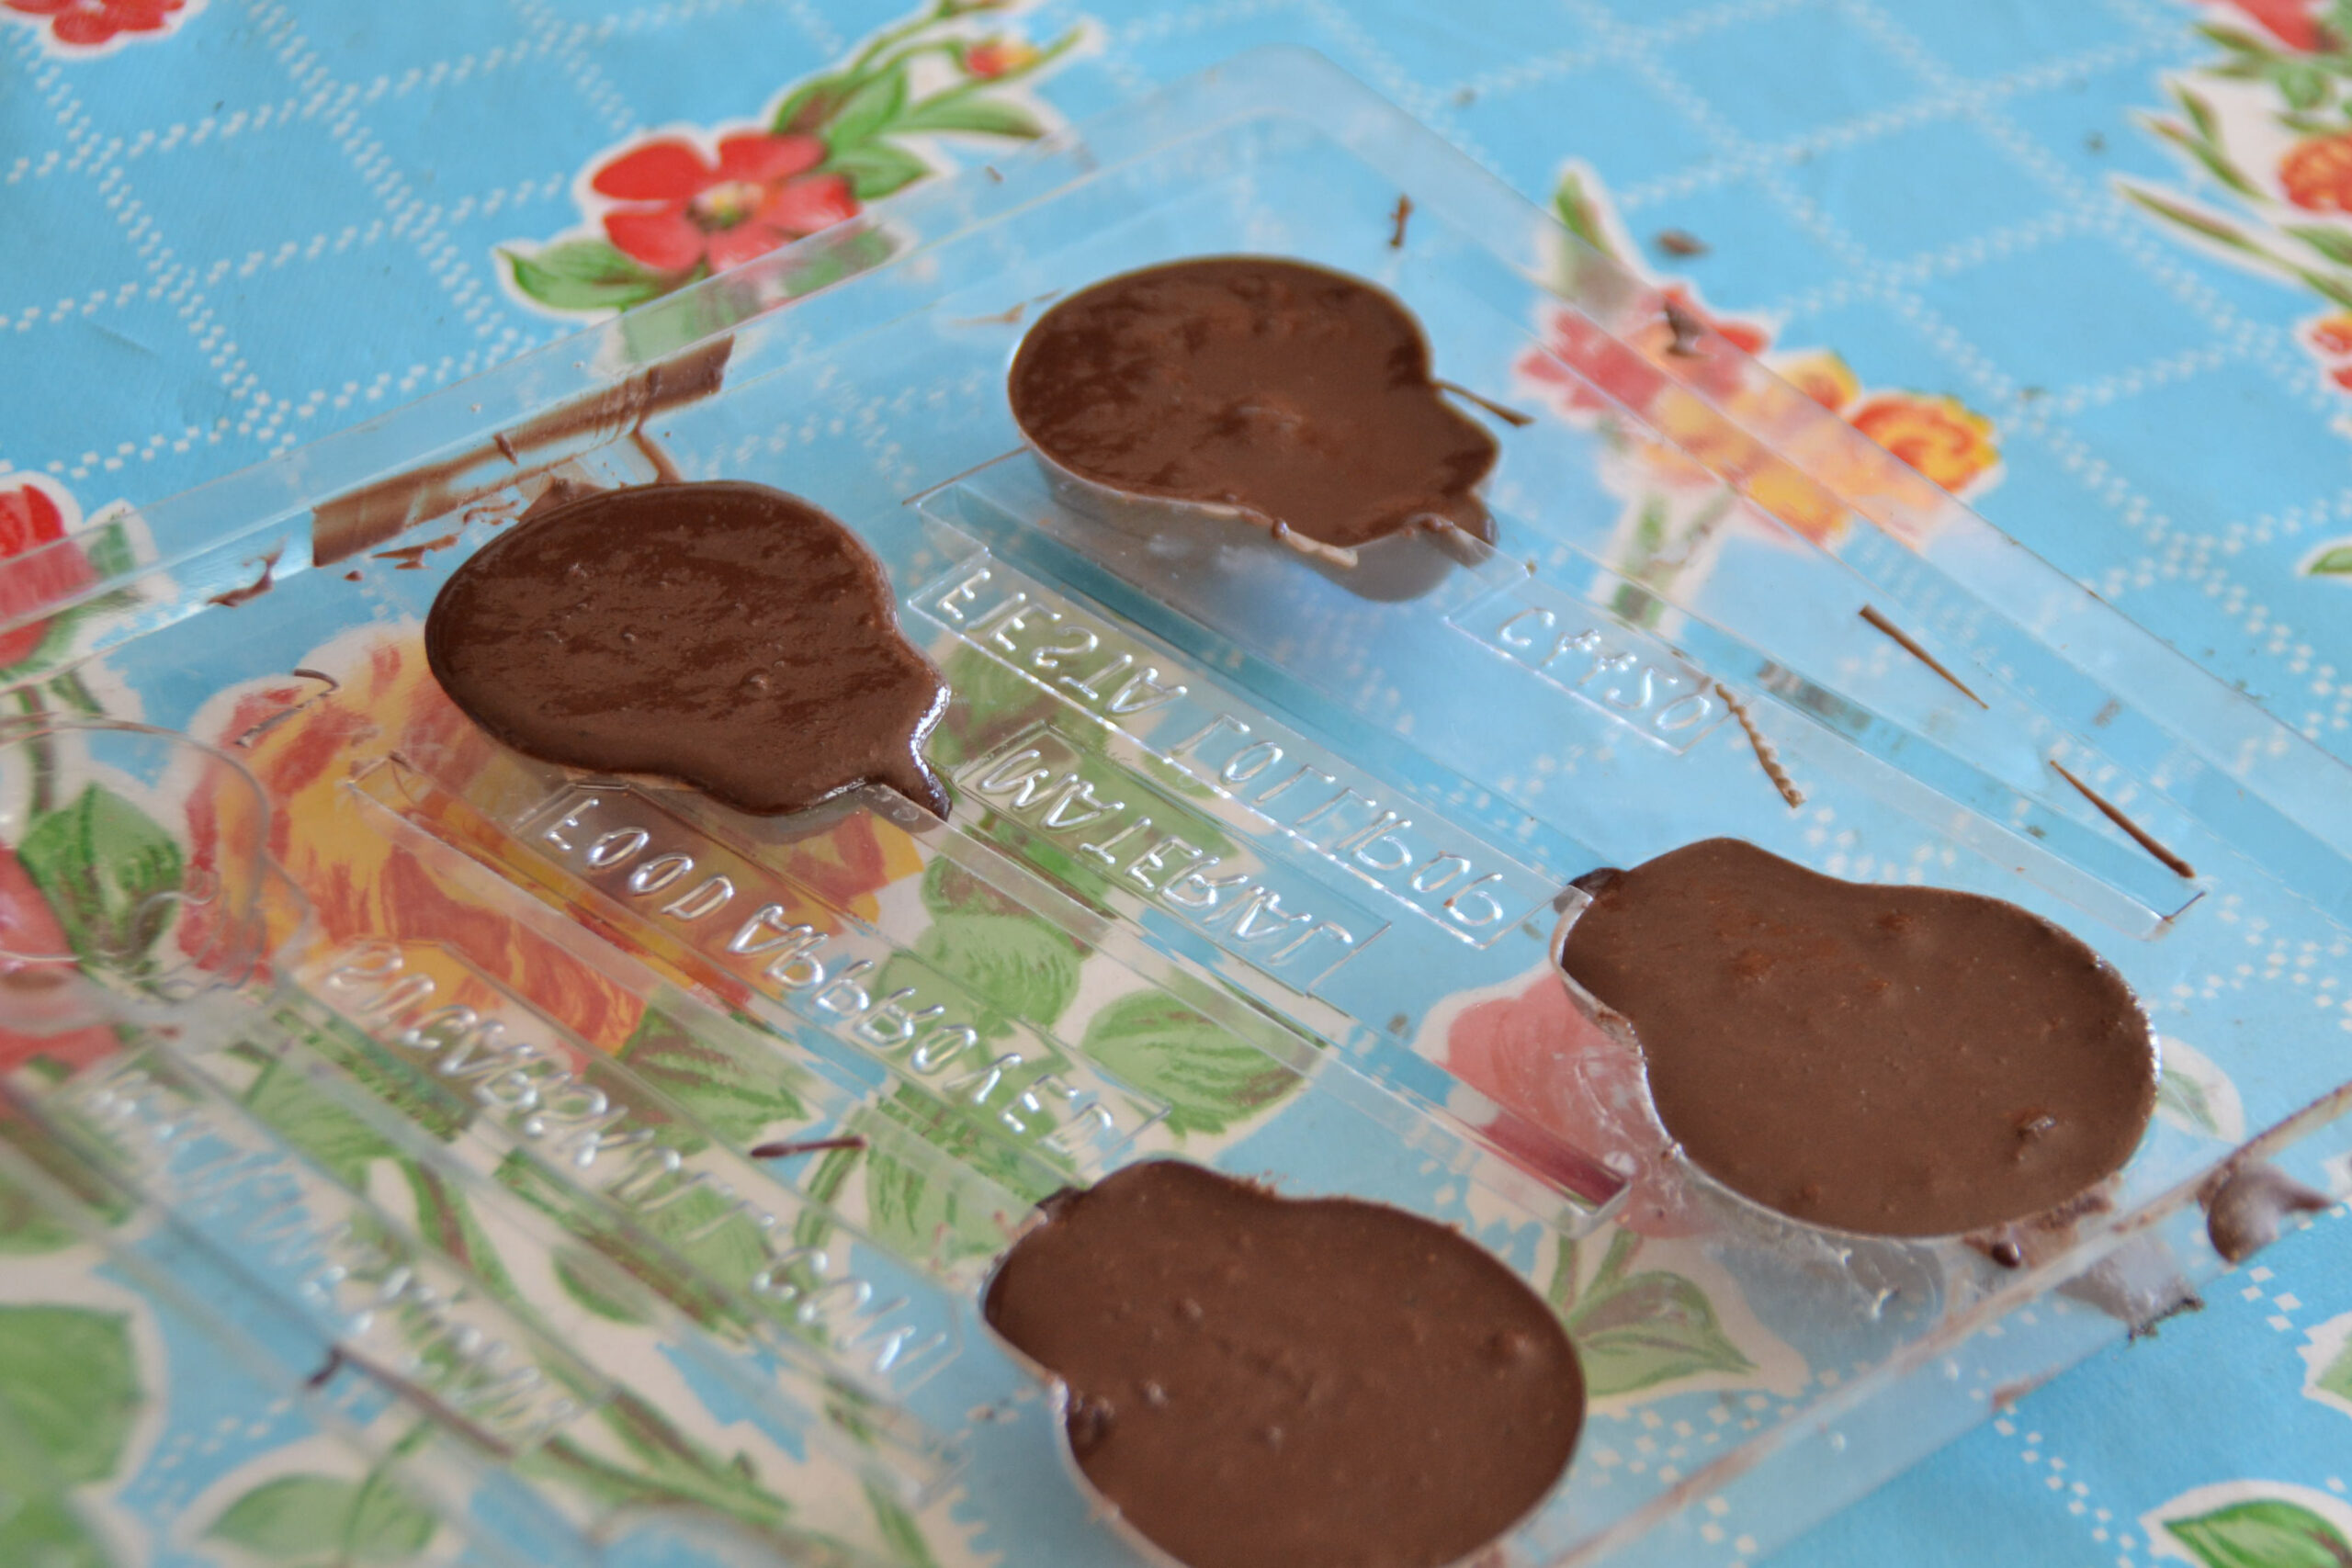
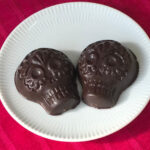
- Using plastic molds: Once it has melted and cooled (cooled to less than 90f), use a piping bag or spoon to fill your molds. Tap the molds on a flat surface to help remove air bubbles and even out. Immediately place in the refrigerator.
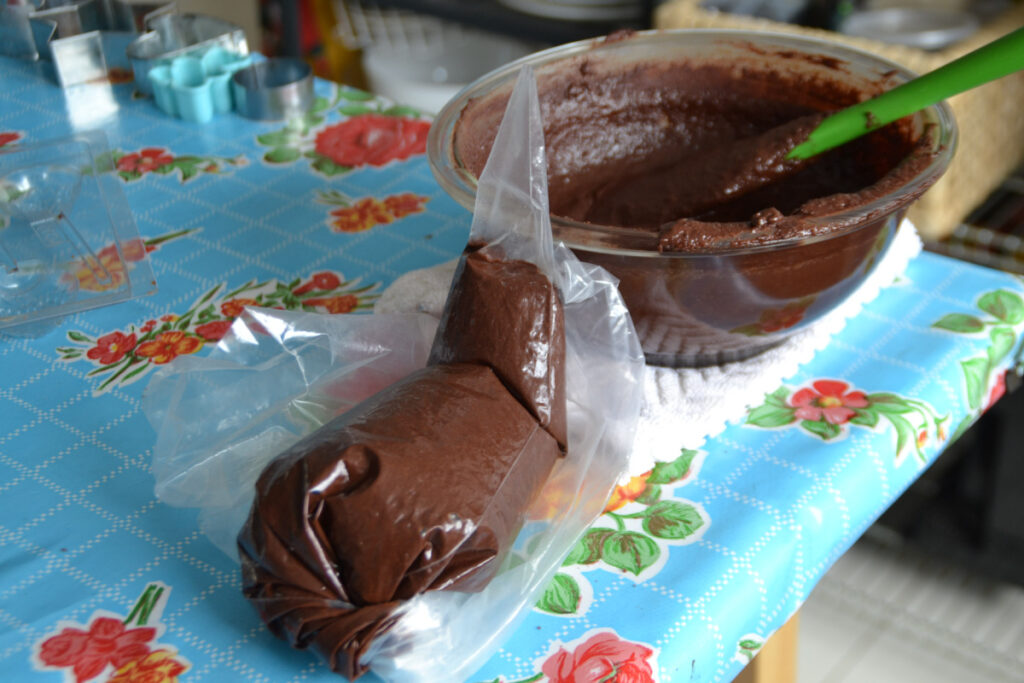
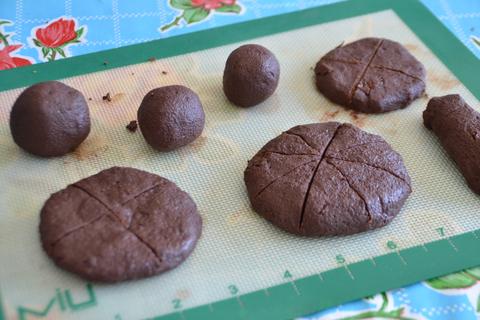
- Using a knife to cut shapes: Pour the mix onto a flat pan with a border, that his been lined with parchment paper. Even it out and let it get medium hard, then use a knife to cut into shapes. If you let it harden before cutting, it might break. If you cut while it is too liquid, it won’t keep the shape.
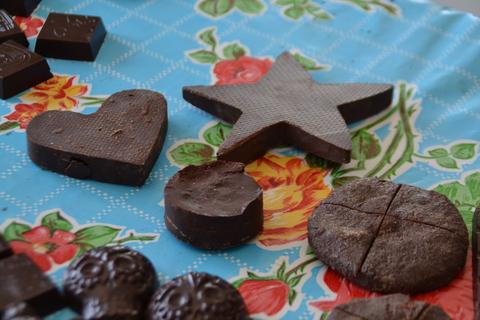
- Using cookies cutters. Using this mix with cookie cutters requires the mix to cool more, under 80f or so. Enough for you to be able to handle it with your hands without it sticking. Put the cookie cutter on a plastic surface and fill the cookie cutter with a bit of the mix. Use your hands or spoon to fill the cookie cutter. As soon as you see that it has set, less than 1 minute, remove the cookie cutter. The chocolate should keep its shape. If it doesn’t, wait a bit more. If you wait too long, it will not come out. Refrigerate immediately.
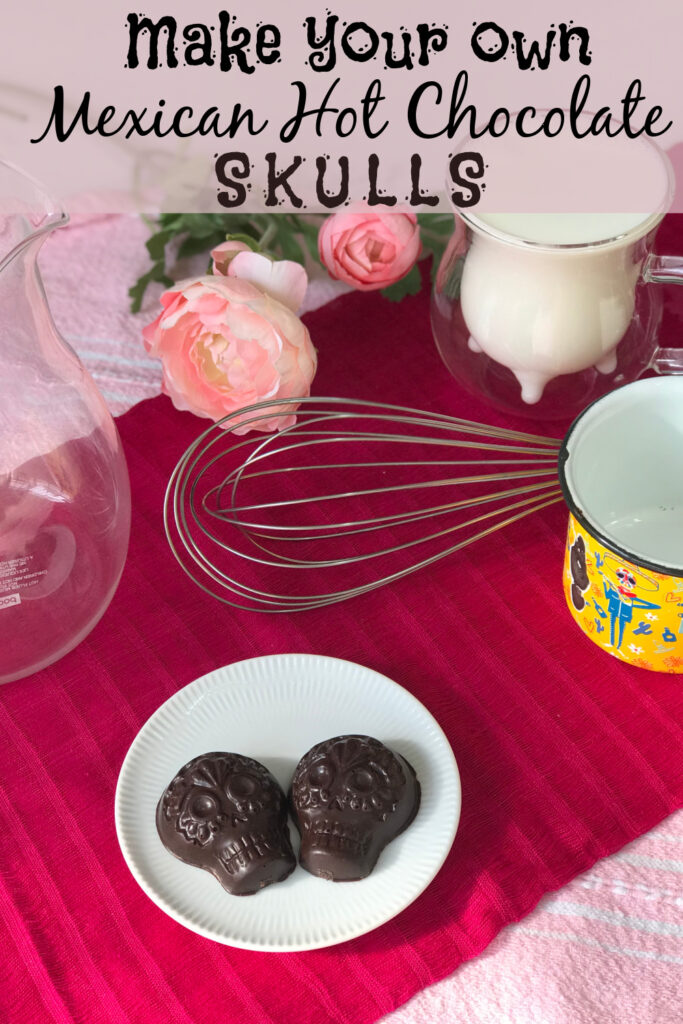
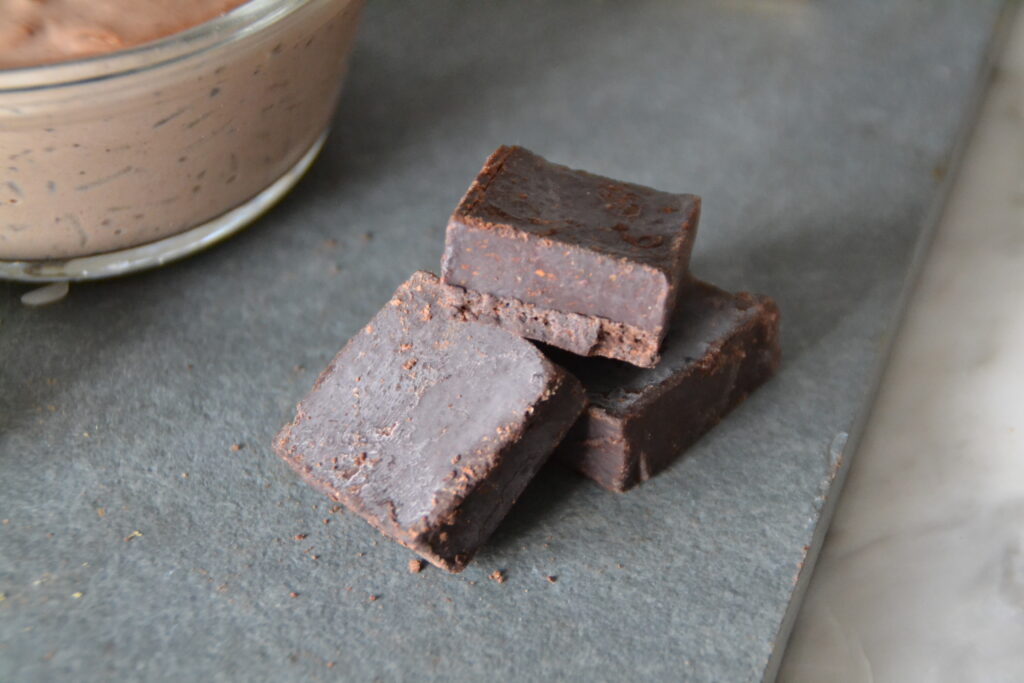
- Using your hands: Allow the mix to cool but not harden, once it begins to get hard it will be difficult to hand mold, the mix will begin to break instead of keeping its shape. Grab a small amount and try to roll into a ball to test. It should be very easy to roll into balls or pat into disks. If you mare making disks, remember to score them with a knife to make them easier to cut later. Refrigerate.
- All of these should harden within 20 minutes. Remove from fridge and store or wrap.They will keep forever in a dry, dark, cool space. They might turn grey or white but this is normal. It’s only the sugar and cocoa butter coming to the surface. It will not affect the flavor of your chocolate.
Equipment
 Buy Now →
 Buy Now →
 Buy Now →
 Buy Now →

Professional polycarbonate molds
Buy Now → Buy Now →
 Buy Now →
 Buy Now →
- Category: hot chocolate
- Method: melt
Keywords: Mexican hot chocolate, ibarra, abuelita, luker, la soledad, skulls, day of the dead, dia de los muertos